Succession to the Legend, Eva's Saint
Succession to the Legend, Eva's Saint é uma quest do Lineage 2 C4: Scions of Destiny (única, solo) para personagens de nível 76+. Começa com Hollint em Town of Oren.
Hollint asks you to verify whether or not the one claiming to be the Saint of Light in Goddard Castle Town is authentic.
Passo a passo de Succession to the Legend, Eva's Saint
A terceira troca de classe de Elven Elder: esta saga transforma o personagem em Eva's Saint no nível 76. Como toda saga, é uma longa peregrinação pelo continente. Aqui seus aliados são Agnes e Duncan, a rota passa por seis Tablets of Vision e as três lutas são contra Fallen Angel Haures, Archon of Halisha e Fallen angel Tanakia.
Aliados e o primeiro amuleto
Town of Oren. Procure High Priest Hollint no templo e aceite a quest.
Town of Goddard. Fale com Saint of Light Agnes.
Hot Springs (teleporte a partir de Town of Goddard). Fale com Chef Duncan.
Ele pede
 Cryolite.
- Cryolite é a recompensa da quest repetível The Finest Ingredients - Part 1, que Jeremy entrega em Hot Springs.
Fale de novo com Chef Duncan. Você recebe:
 Offering.
Town of Goddard. Volte até Saint of Light Agnes. Você recebe:
 Resonance Amulet - 1.
As três primeiras tábuas
Plains of Glory. Fale com Tablet of Vision.
Valley of Saints (teleporte a partir de Rune Township). Cace Guardian of Forbidden Knowledge (nv. 76) até juntar:
Resonance Amulet - 2.Os guardiões ficam em volta da segunda tábua. Continue matando até um deles deixar o amuleto.
Fale com Tablet of Vision.
Pilgrim's Temple. Fale com Tablet of Vision.
Ao tocar a terceira tábua surge Fallen Angel Haures. O monstro fica pouco tempo, então esteja pronto para lutar antes de falar.
Mate Fallen Angel Haures (nv. 76) para obter:
Resonance Amulet - 3.Volte até Tablet of Vision.
A Pedra Divina e a quarta tábua
Town of Goddard. Procure Priest Bastian na guilda dos magos.
Escolha a quem ajudar: os orcs Ketra ou os Varka Silenos. Nos dois casos você precisa trazer
 Divine Stone of Wisdom: o mensageiro Ketra Wahkan o entrega pela quest Magical Power of Water - Part 1, o mensageiro Varka Naran Ashanuk pela Magical Power of Fire - Part 1. As duas quests exigem aliança de nível 2 ou mais com aquele lado.
Fale de novo com Priest Bastian. Você recebe:
Resonance Amulet - 4.Monastery of Silence (teleporte a partir de Town of Goddard). Fale com Tablet of Vision.
Os lacaios de Halisha e as últimas tábuas
Town of Goddard. Volte até Priest Bastian na guilda dos magos.
Shrine of Loyalty. Cace Grave Scarab (nv. 73), Scavenger Scarab (nv. 73), Grave Ant (nv. 74), Scavenger Ant (nv. 74), Shrine Knight (nv. 75), Shrine Guard (nv. 75) até juntar:
 Halisha's Mark ×700.
Com 700 marcas na mochila, as próximas mortes fazem aparecer Archon of Halisha, que ataca na hora. Um caminho mais rápido para um grupo forte é matar um Archon of Halisha dentro de Four Sepulchers: também vale.
Mate Archon of Halisha (nv. 76) para obter:
Resonance Amulet - 5.Wall of Argos (teleporte a partir de Town of Goddard). Fale com Tablet of Vision.
Rune Harbor. Fale com Tablet of Vision.
Na sexta tábua surge Fallen angel Tanakia junto com Verdure Wiseman Elikia. Ataque o monstro até ele recuar e depois fale com Verdure Wiseman Elikia: o último amuleto vem dessa conversa.
Fale de novo com Tablet of Vision.
Você precisa de
Resonance Amulet - 6 do passo anterior para comungar com a tábua.Town of Oren. Volte até High Priest Hollint no templo para concluir a quest.
Dicas
- Consiga Cryolite e Divine Stone of Wisdom antes de começar: os dois vêm de quests paralelas e, com eles na mochila, a saga vira uma viagem só.
- As marcas são contadas por personagem, mas os monstros de Shrine of Loyalty morrem muito mais rápido em grupo, e vários jogadores podem juntar ao mesmo tempo.
- A classe muda na última conversa com Hollint, então volte no nível 76 ou acima.
Diário da quest
Meet Saint of Light
High Priest Hollint says the Saint of Light has appeared in Goddard Castle Town and asks you to meet her and verify that she is actually the legendary saint.
Vá até: Saint of Light
Searching for Duncan
Saint of Light Agnes asks you to visit Chef Duncan in the hot springs area and bring her some food.
Vá até: Duncan
Return with the Ice Crystal
Chef Duncan needs ice crystals to keep the food fresh.
Vá até: Duncan
- Cryolite×1
Return to Saint of Light
When you deliver the ice crystals, Chef Duncan hands you a well-packaged jar containing the food. Take it to Saint of Light Agnes.
Vá até: Agnes
- Offering×1
Go to the Tablet of Vision
Saint of Light Agnes gives you the Stone of Commune and tells you to go to the Tablet of Vision.
Vá até: Tablet of Vision
In Search of the Second Stone of Commune
According to the first Tablet of Vision, you'll find the person with the Stone of Commune near the next tablet.
Vá até: ???
Towards the Tablet of Vision
You've got the second Stone of Commune. Go to the Tablet of Vision and try communing with it.
Vá até: Tablet of Vision
In Search of the Third Stone of Commune
At the second tablet, you saw who has the Stone of Commune near the third tablet. To find him, commune with the third tablet.
Vá até: Tablet of Vision
Towards the Tablet of Vision
You've got the third Stone of Commune. Go to the Tablet of Vision and try communing with it.
Vá até: Tablet of Vision
Meet Bastian
At the third tablet, you learned that that Priest Bastian in Goddard Castle Town has a Stone of Commune. Visit him and get the Stone of Commune.
Vá até: Bastian
In Search of Ketra Orcs
Priest Bastian tells you to gain the trust of Ketra's Messenger Wahkan and get the Divine Stone of Wisdom.
Vá até: Ketra's Messenger Wahkan
In Search of Varka Silenos
Priest Bastian tells you to gain the trust of Varka's Messenger Naran Ashanuk and get the Divine Stone of Wisdom.
Vá até: Varka's Messenger Naran Ashanuk
Towards the Tablet of Vision
You've got the Divine Stone of Wisdom and made a new Stone of Commune. Now, go to the Tablet of Vision and try communing with it.
Vá até: Tablet of Vision
Meet Bastian
The location of the next Stone of Commune is not revealed, but Priest Bastian of Goddard Castle Town is briefly seen motioning goodbye. He may know something. Speak with him again.
Vá até: Bastian
In Search of the Stone of Commune
Priest Bastian tells you that if you go north from the fork in road, you'll get to the Shrine of the Loyal. If you go east from there, you'll find the Imperial Tomb.
Monsters to Hunt -
Shrine of the Loyal: Grave Scarabs, Scavenger Scarabs, Grave Ants, Scavenger Ants, Shrine Knights, Shrine Guards and the Archon of Halisha
Imperial Tomb: the Archon of Halisha
Vá até: Fork
Towards the Tablet of Vision
You've got the fifth Stone of Commune. Go to the Tablet of Vision and try communing with it.
Vá até: Tablet of Vision
In Search of the Last Stone of Commune
You feel that the last Stone of Commune is near the tablet. First, go to the tablet.
Vá até: Tablet of Vision
Towards the Last Tablet of Vision
You've defeated the fallen angel Tanakia and taken his Stone of Commune. Now, try the last communion.
Vá até: Tablet of Vision
Finishing the Journey
The long journey has ended. Report your accomplishments to High Priest Hollint in Oren Castle Town.
Vá até: Hollint
Finishing the Journey
Train some more before you return to High Priest Hollint in Oren Castle Town.
(Only characters of level 76 or above may change their occupation to Eva's Saint. Don't abandon the quest until occupation change is complete.)
Vá até: Hollint
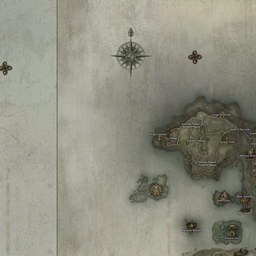
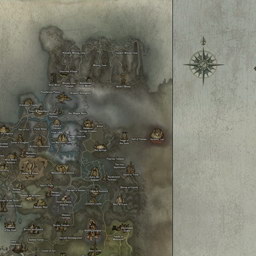
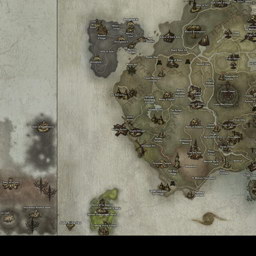
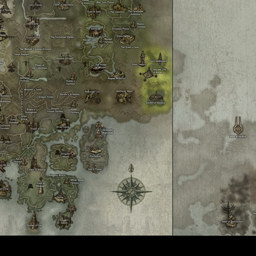
Mapa
Itens da quest
Quests: nível 72–80
- Succession to the Legend, Cardinal · Nv. 76
- Succession to the Legend, Hierophant · Nv. 76
- Succession to the Legend, Adventurer · Nv. 76
- Succession to the Legend, Arcana Lord · Nv. 76
- Succession to the Legend, Archmage · Nv. 76
- Succession to the Legend, Dominator · Nv. 76
- Succession to the Legend, Doomcryer · Nv. 76
- Succession to the Legend, Dreadnoughts · Nv. 76
- Succession to the Legend, Duelist · Nv. 76
- Succession to the Legend, Elemental Master · Nv. 76
Comentários
Ainda não há comentários. Sabe algo útil sobre esta página? Compartilhe.